Posted tagged ‘roubo bench’

American Woodworkers’ obsession with weight

February 6, 2015

Just a few years before the turn of the century (1998), American woodworkers began to be obsessed with weight.  A picture appeared in “The Workbench Book” by Scott Landis.  The picture showed Rob Tarule, planing away on a reproduction of a “Roubo Bench”.  It was weighty and nicely joined – the race was on.

IMG

Since then, weight has been the watchword.  But, alas, as with so many things in life, we may have allowed ourselves to be mislead.  And, I’ll say it now, me too.  Three hundred, fifty pounds sounded like a good weight.  We appear to have identified weight with stability.  And, believe me, brothers and sisters, they’re not the same thing!

When one looks at the illustrations in “L’art du Menuisier”, it becomes obvious that these were to provide information about how the work was accomplished in Monsieur Roubo’s atelier.  Note that there are no dimensions on the benches.  The drawings are crudely isometric.  And, after looking at the illustration of a half dozen or so benches “fanned out” in the shop, one can only assume that any one of them must have weighed a thousand pounds (1000 lbs.), or so.  Also, there seems to be some notion that the method used to join the legs to the bench top is somehow superior.  Consider this, timber frames need bracing against wind load.  I’ve got to believe that those legs loosened up after a period of time (nail on the crossbracing!).  I’m here to tell you that even in professional shops, things get moved around according to the work being done.  What professional woodworkers have always been concerned with is stability.  Stability and portability.  Stability, portability and cost.

Not everyone has the space for a 1/2 ton workbench.  Many amateurs and professionals alike work in shops that are rented space, or spaces (basements, attics, corn cribs, etc.) that would make it difficult to position one of these Leviathans.

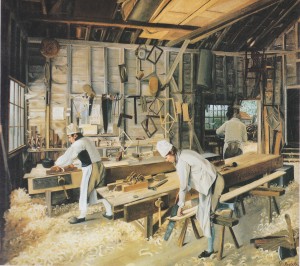
If one looks back at historic documents (carvings, paintings, drawings) other than Roubo and Deiderot, a different picture begins to appear.  Consider the English joiner’s bench.  They are now commonly referred to Nicholson benches.  But the design was around long before Mr. Nicholson arrived on the scene.  He merely documented what was normal in English shops of the day.  Some of these benches reached staggering proportions, as the ones used early in the twentieth century for the assembly of wooden air frames.

english joiners

Scandinavian and German style cabinetmakers benches have long been the standard of both European and American shops.  By comparison to anything in the “Roubo” class, they appear puny.  But they became the standard for one reason, they fit the needs of the work to be accomplished.

swedish workbench

German cabinet makers bench

Recently I read a post by Tomas Karlsson at www.hyvelbenk.wordpress.com on a very nice portable workbench with some very interesting features.  In case you’re not a follower of the “goings on” at Høvelbenk, you should be.  In case you don’t already know, Høvelbenk translates to planing bench. The guys at Høvelbenk investigate all aspects of benches designed for woodworking.  IMHO, it is a “must read” blog, along with its “sister” blog, www.skottbenk.wordpress.com.

Another “revival” seems to be in the making.  And it’s good news for anyone who is interested in a stable, reasonably portable, professional workbench.  Enter the “Moravian”.  The design has been around for several hundred years.  Easily built, movable and stable, very stable due in large part to the legs be splayed (as opposed to raked).  Høvelbenk has a nice post on a Moravian bench built by one of Tomas Karlsson’s students, Anton Nilsson.

nilsson's bench

Roy Underhill has been offering a class in Moravian Workbench construction, lead by Will Myers at the Woodwrights School.

moravian_overall_img_3548

Before I forget, Jeff Branch has put up some pretty nice drawings of a Moravian bench he plans to build. You can see them at www.jeffbranch.wordpress.com.

I said I’d never build another workbench.   But I’ve eaten my words before and when served with some appropriate beverage, they’re not half bad.  I think that I would add a center stretcher between the two upper trestle rails.  It seems to me that the locator pins holding the top might take some unnecessary but avoidable stresses. I’d probably lag bolt the top.  But that’s just me and I’m not going out to jobsites anymore (I’ve become a “woodworker of leisure”, in any number of ways).  I think I’d opt for a couple of antique cast iron vises (Oh!  My goodness, I think I’ve got a couple of those stashed away, if I can just find them.)

So.  If it’s an altar you’re wanting, by all means, go buy yourself a stake truck full of heavy timber and build yourself a Roubo.  But if you’re desirous of a stable, portable platform upon which to carry out the manufacture of various assorted parts associated with woodworking projects, think “Moravian.”

And by the way, if you can move this bench around while planing, you probably need to sharpen your irons.  There just isn’t enough weight to compensate for dullness.


Nicholson Bench Project – A gallery

May 9, 2014

Nicholson Bench Project Update – Cross stop complete

May 7, 2014

The mill of time grinds slowly, but exceedingly fine.

So we’re old and we’re slow.  But we finely got the cross stop finished (except for a coat of BLO) and in place.  It’s made out of walnut, because that’s what we had.  It has two 1/2″ thick cheeks with intermittent 3/8″ spacers placed over the leg sets and cross members, made long enough to accommodate several steps, which will allow the stop to be positioned 1/4″ or 1/2″ above the surface of the bench to hold material in place while planing across the grain (cross planing).  The steps were simply “rubbed” with Titebond I, so no clamping was necessary.

029

steps glued in place ready for trimming and fitting


030

cross stop set at 1/2″ position

031

cross stop provides temporary storage for saws, protecting teeth from a “workbench catastrophe”

033

cross stop in “storage” position


Nicholson Bench Project – Shellac on a workbench?

April 20, 2014

We’re getting closer to finishing this thing up and putting it into everyday service.  One question has been repeatedly asked; why are you using shellac for a finish on a workbench?

The normal thinking is that shellac is for fine furniture, musical instruments, carvings and objets d’art.  And, of course, the assumption is that the surface would be too reflective and “slick” for a workbench.  But the truth of the matter is that shellac provides a durable, protective film that will withstand the harshest treatment.  Recoating and repairing a shellac finish is very, very simple; just apply a new coat over the old film, as the alcohol solvent “re-wets” and “bites” into the existing film, creating a complete bond.

But the most significant reason to select shellac as a workbench finish is that it is fast.  I was able to put on four coats in something under three hours.  It would have taken me four days to put on four coats of oil.  This may not be important when you’re first building a bench, but when you decide to recoat an existing bench, you want to be able to get the job done as quickly as possible.  Time is money.

012

There is, however, one caviat.  If you’re using a shellac that has any color (orange, amber, garnet, etc.), you must be careful to apply very even layers to avoid lap marks.  Witness above.  I was using amber shellac (because that what I had) and literally “throwing it on” with a big, soft brush.  You can see the lap marks on the apron.  While this does nothing to diminish the protective quality of the finish, it does wear at my artistic sensitivities.  It’s a pretty simple problem to repair.  A little sanding or scraping on the apron’s surface, and a single coat of shellac, padded on, will take care of the problem.

015

While “rooting” through some old finishes, I found a can of One-Shot sign painter’s gold enamel.  The last time I used this stuff was in 1976.  No one, in their right mind, would use something that old, right?  Well, I opened the can, stirred it up and it looked pretty good.  Painted up a little sample and to my surprise it dried just like it was supposed to.  So I just couldn’t resist a little “faux gilding” on the date carved into the vise chop.  And, we do plan to replace the pipe handle with something a little more “appropriate”.

002

Nicholson Project – Finishing up

April 11, 2014

When you’re working in two and three hour blocks of time, it’s hard to maintain momentum.  Especially when the project participants are from the “curmudgeonly” class.  But we’re almost there.

The front vise chop is massive, nearly twenty inches wide.  The slide bar is 2 1/2″ square.  The slide box isn’t even permanently attached, yet the vise travels smoothly.

004

We decided that we would use shellac for the frame and a traditional oil finish (BLO and wax, maybe a little turpentine) for the tops and aprons.

Orange shellac and red oak equals “Golden Oak”, the color of half of the kitchen cabinets and trim in North America.  Shellac allows you to build a good film thickness very quickly and can be applied in “less than clean room” conditions.  If it’s a little rough, simply rub it out with steel wool, then wax it back up to the level of reflectivity you desire.

007

Someone asked me if there was any rhyme or reason to the holdfast hole pattern.  I said yes, there is a rhyme and a reason,  and there both in my head.  Just leave it at that.  A few more “fancy schmancy touches” and we’ll be in business.

Nicholson update – the “almost” roll-out

March 30, 2014

As the poet, Robert Burns said “the best laid schemes o’ mice an’ men, gang aft agley”  Due to scheduling problems, a partial “roll-out” was all we could muster over the weekend.  But it proved worthwhile, nonetheless.

100_3400

Considering the outstanding torsional rigidity of the structure.  The deep cross members provide another benefit, more weight.

100_3403

This 3″ thick slab of ash will become the chop of the face vise.

100_3405

The slide box for the face vise.  It will be mounted between the aprons.

125

The slide box is built “around” the slide.  The slide is removed and scraped to provide just enough clearance for movement.

100_3408

Surface dimensioning using a temporary cross stop.

100_3410

Ripping.  Sawing from the side would move a “lesser” bench.  But there’s plenty of weight here to keep everything in place, even though nothing is bolted fast, at this point.

100_3416

Cross cutting.  Easier than sawing on top of the bench.  But still, a proper shop will have a saw bench, built to appropriate height.

100_3412

Planing an edge against the crochet.  Such a simple, marvelous device.

As soon as the bench is “fully dressed”, I’ll put up the gallery.


Nicholson project update

March 26, 2014

We’re going to make the cross members full height.  This will add to the torsional integrity of the bench, making it a very strong “box beam” structure.  We’ll locate the cross members with the help of a stopped sliding dovetail.  The lower portion of the cross member will be lagged into place to pull out any irregularity in the apron surface.  (If you choose to use a stopped dado, remember you’ll have to lag it top and bottom.)

026

Our dovetail is marked out and we’ll cut it will a backsaw.  Note that we aren’t using any saw guide blocks.  If you haven’t done much hand sawing, it might be a good idea to use a guide.

027

After we cut the “cheeks” of the dovetail, we remove the bulk stock.  A small router, router plane or simply “hogging” out with a bench chisel will do.  A sharp paring chisel will be required to do the final fit up.

029

Here we’re using the bench, prior to completion for some fair heavy chisel work.  Note that the bench is being held together with clamps.

025

 The finished joint and the full height cross member.  These two features add incredible stiffness and weight (always a good thing, in workbenches).

033

The storage shelf is put into place.  A ledger is added to the lower stretchers and loose shelf boards are laid in place.  Be sure to leave enough space to accommodate seasonal expansion.  Lapped jointed boards are probably NOT a good idea here, as falling debris will impede their movement.  Remember, this shelf is for big stuff, not jewelry.

035

The Crochet, or Hook, is attached to one of the top halves with lags.  It will be a great help while joining multiple boards.

036

Over the weekend, we’ll “roll this baby out”.  We’ll be exploring many of the work holding methods that the Nicholson bench accommodates.  Should be very illuminating.


Nicholson Bench – construction continues

March 16, 2014

After some discussion about certain details of the build, we head back to the workshop.

100_3344

We still have a few mortises to make.  Most of you know that this blog is dedicated to handwork.  That said, many of the joints were machine cut, due to our compressed schedule.  But one of the goals of this project was to put the construction of a heavy,”first-class” bench well within the reach of woodworkers working exclusively with hand tools.

Remember to position yourself in a way that allows you in maintain squareness while cutting the mortise.

10007451

Tenons on the stretchers are hand cut, as this is considerably easier than maneuvering the long pieces on the table saw.  It’s a very good idea to incise the shoulder line, then create a “guide groove” on the outside of the line with a good sharp chisel.  This makes cutting the shoulder of the tenon much easier.

10007463

10007466

10007474

It’s important that the leg sets be clamped squarely while the glue is curing.  (We’ll pin them after they’re dry, just for a little additional insurance).  If we were working with air dried lumber we would draw bore and draw pin the leg sets together.  We’ve measured, then used a clamp on the diagonal to pull the leg set into square.

10007457

The material for the aprons has been cut to length.  We’ve decided to shorten the bench a bit.  Originally it was going to be seven feet (7′).  But, bearing in mind, that we’re somewhat limited for space in the classroom, it will now be just six feet (6′).  Still it will be a substantial workbench.  The tops are 2 1/2″ thick and the aprons 1 3/4″.  We had our sawyer, Dennis Sharples plane and rip the material.  Normally, we would have prepared the stock by hand.  But again, some concessions to modernity had to be made in order to stay on schedule.

10007453

Here, Carl and I are dry fitting the base for last Saturday’s demonstration.  I’m really “getting into my work”.

000_0110

If I looks as if I’m supporting myself and preparing to faint, it’s due to the fact that we just put the aprons and tops in place.  At this point, the bench is being help together with just four clamps.  Still, it’s amazingly stable even without the fastening bolts that will pull it all together.  We’re guessing the weight at this point is around 225 pounds.  When we’re completely finished, we’ll do a legitimate weight analysis.  Even in it’s shortened form, it could be very close to 300 pounds.

000_0115

A little camaraderie at the end of the demonstration.

000_0117

Next week our goal is to have all of the boring done for connection bolts and holdfasts, the vise, crochet, shelf boards and cross-members ready to install.

Nicholson Bench build continues

March 12, 2014

As Winter Storm Vulcan howls outside, work continues on the Nicholson bench for the classroom.

View from my living room window.  Honestly, enough.

View from my living room window. Honestly, enough.

We’re starting to “dry fit” the base together.  “Doublers” that will provide additional clamping surface adjacent to the aprons have been glued in place.  As there are “right and left” components in the base, it is very important to double check lay-out.  And, upon dry fit, it’s a very good idea to match mark parts.

001

As a “lesson learned”, we could have simply centered our stretcher mortises on the primary leg face.  But we’re designing on the fly and for some reason, we decided to move the stretchers closer to the outside surface.  Can’t remember what the reason was, but centered should be just fine.

Les presented a “prototype” that might have served as a “universal” primary leg.  After noticing a look that indicated Les’ wry sense of humor, I realized that he was pulling my leg.

003

Tenons are hand fitted.  The “leg set” will be glued and pinned.  Accordingly, the stretcher tenons have a slight interference fit, that will provide enough room for the glue to do it’s job.  Be careful to give yourself a little depth clearance.  There’s nothing quite like trying to pull a joint together that has an excess of glue in the bottom.  It is virtually impossible to do.  In fact, with enough clamping pressure, a hydraulic event can occur that will literally blow the joint apart.  By the way, Les is using a Record 073, one of the best planes ever manufactured for this type of work.  If you ever see an 074, buy it, on the spot.

004

The longitudinal stretcher tenons have a slip fit, as these joints will be made fast using bed bolts.  This will not be a bench that will be easily broken down, due to its weight.  But we decided that we should have the ability to dissemble it, if necessary.

Here is the undercarriage (base, frame) dry fitted.  At 6′ 6″ long, it is substantial.  So much so, that we may shorten it up a bit.  Reducing the base length might give us a little more latitude, should we decide to mount some type of end vise.  However, we’re not sure if there is a need for that type of device, just yet.

007

Next will be dry fitting the aprons and lay out and making of the center cross members.  After that will be the installation of the main vise, attachment of the top and crochet.  Then, of course, boring holes (lots of holes) and finishing.  Should be ready for Spring, so to say.

Work on the “End All – Be All Bench” begins

March 7, 2014

Last week we took it upon ourselves to determine some of the defining parameters that we felt we should work to, while building the Nicholson bench for the Toledo Woodcraft Store.  There are only a few.  First:  workbench height will be at 34″.  This is a compromise, as the bench will be used by people of varying heights.  The ideal way to judge correct bench height for a bench to be used for handwork is to measure from the floor to the wrist of the user, or (and probably more ergonomically correct) from the crease of the buttocks to the floor.  Of course, this would be the user’s buttocks (old timers regularly “hiked one cheek up” on the bench while cutting mortises, in fact there are benches built for the sole purpose of mortising and they are typically knee height, so one could sit “astraddle” of the workpiece).  Second: simply enough, was to build the bench heavy.  A workbench cannot be too heavy or too long.  Let me repeat that, a workbench cannot be too heavy or too long.  However, a workbench can be too high and/or too wide.  So, be advised.  (Save time, save money, learn from the mistakes of countless thousands of craftsman who thought they had a better way, that’s how “standards” got started.)  And third:  use the most effective joinery methods.  This translates into joinery that is not only pretty, but joinery that will stand up to repetitive movement and stress.  So, now it begins in earnest.

033

Above is 2/3’s of today’s crew ripping stock for the leg sets.  Between Carl, Les and I, we’ve got over a hundred years of woodworking experience.  What does that mean in real terms?  It means we’ve made a whole lot of mistakes over the years.  A whole lot of mistake that you don’t necessarily have to make yourself.   Readers of this blog should realize that everything we’re doing here can be done with hand tools.  Only thing is it would take a whole lot longer.

So the first things we’ll build are the two leg “sets”.  Here’s a little “cartooned” illustration.  Dimensions aren’t important.  And remember, you can use almost any lumber, durability is the driving factor.  Just remember, it should be of a proper thickness to allow a holdfast to work efficiently.

IMG


We’re moving now and it won’t be long until we complete the bench.  But in the meantime, I’m wishing for warming temperatures because this is what is just outside my front door.  Is it Ohio or is it Siberia?  You be the judge.  My Norwegian friends will surely enjoy this.

005

We’ll have this thing put together well before we play our first round of golf (June 1?).


Skottbenk equals sticking board – Big sticking board

February 28, 2014

This is a typical situation with a "skottbenk" used with at "skottokse" (the handplane) for shooting the edgde of a long board. Photo: Roald Renmælmo

Roald Renmælmo posted this photo today on Norsk Skottbenk Union, and graciously allowed me to re-use it.  Roald and his associates are doing great research into traditional work methods from Northern Europe, especially Norway.  His post describes the skottbenk as a Jointing Bench, Shooting Bench or Sticking Board.  Ah!  The light went off in my head – Sticking board!  That immediately explains it’s use to anyone coming from the English-American tradition.  It is one big sticking board.  I’m surprised that these benches were not commonly used in the U.S., especially in the Upper Midwest, in the large Scandinavian American Communities.  Maybe they were and there simply isn’t much about them in current woodworking literature.  If anyone can enlighten me, I’d appreciate it.

Roald and his associates also provide more general information about workholding methods at Hyvelbenk.Wordpress.com.  I’m looking forward to following their research.  And I’ll try to get Roald to share more information about the specialized “two man” planes used in his part of the world.  Thanks for the Internet, so we can learn more about the past.  How ironic.

If you don’t know your hyvelbenk from a skottbenk – you should

February 26, 2014

Most handwork aficionados in the U.S. practice what might be referred to as “the English system”.  The style of our tools and workholding devices pretty much follow a pattern that has been developed over the last three hundred years or so, largely by practitioners who speak English (well maybe a few speak French).  But brothers (and sisters), there are a lot of other ways to skin that old cat.

If you’ve ever tried to dress and joint any heavy plank, you know that it can be a tough job, very tough indeed.  Well, in the Scandinavian countries, heavy plank construction has been widely used over the centuries and the Norsemen have developed planing benches specifically for the task, the skottbenk.

Skottbenken. Bilete skanna frå artikkelen til Arne Vennevik i Årbok for Namdalen 1981

The photo above was “borrowed” from the blog  Norsk Skottbenk Union.  If you’re interested in handwork, workbenches and woodworking history, you need to go to this website!  Now!  (As soon as read the rest of this post).

The planes that are used in this process are of particular interest, as, for the most part they are “two man” designs.  There are planes for jointing, tonguing and grooving.  These are the hyvels.  More on planes and workbenches is to be found at Hyvelbenk.

Both of these blogs are written by professional woodworkers and historians.  Both are packed with excellent photography.  The blogs are written in Norwegian, but it’s amazing how much information  you can pick up from photos.  Maybe, with a little encouragement, the writers will help us figure out a way to translate so we can all benefit from their research and the information they are presenting.

Enjoy

Extraneous decoration or Cautionary Tale?

August 4, 2012

In times past, carpenters, joiners and masons alike, dated and signed their work.  Farmers who built their own buildings often left a great deal of information on posts and beam ends.  And many times, some appropriate admonition would be carved into any number of finished products.  So I thought it only appropriate to not only date the new workbench under construction, but to also include a reminder to myself to not waste time.  It is one of the most valuable things we have.

The base is substantial, but is made in such a way that the entire bench can be dissembled for transport.  The routed areas are required for the mounting of the Emmerts vise.  Had I realized how heavy the Emmert vise is and the amount of stock that must be required, I may have designed a base with three trestles.  I’m anticipating some deflection problems with the 2 15/16″ top sometime in the next 100 years.  I’m planning to hang a drawer under the bench to hold bench dogs, temporary jaws etc.  And there is the possibility of installing a small antique vise on the right end to act as a tail vise.  More weight…but in a workbench, heavy is a good thing.

Underside of bench inletted to receive Emmert’s Vise

Another two to three days should put the bench into operation.  Then I can get on to more profitable exercises.

Oh!  For those of you who are too young to have had classical Latin “beaten into you”,

“Tempus Fugit – Memento Mori” means time is fleeting – remember you will die.  In other words, get past the “white paper” syndrome.

Stay tuned for when the vise goes into action…and I’ll close with one other “classical” bit of wisdom…

“Enough is abundance to the wise” – Euripides

Is that a “Lamb’s Tongue” or Gene Simmons in the distance

July 27, 2012

The new workbench is going a little slower than I’d like.  And one of the reasons for the delay is my decision to include some absolutely useless decoration on the base.  The decorative effect I’ve chosen to use is an old, and very traditional, edge treatment known as a stopped chamfer with a “Lambs Tongue” terminus.  You don’t have to have a fantastic imagination to understand why the terminus picked up its common name.  And you would only need to see Gene Simmons and the “KISS” gang to understand why our younger brethern (and sistern) might identify it with something seen on the concert stage.

This was a very common edge treatment for posts, beams, balusters and other architectural details.  So in times past, carpenters and joiners, alike would have been very familiar with its use.  Upon closer inspection, it’s obvious that, viewed from the side, it is simply an ogee shape that has been rotated 45°.  Some folks go to a great deal of trouble, laying out small ogee patterns on both sides of the chamfer, then shape the “tongue” with rasps and files.   Believe me, if you were a carpenter or joiner on a job site with dozens of posts and beams to complete, or a joiner with hundreds of balusters to shape, you’d take a somewhat more pragmatic approach.  You would simply mark the length of the tongue, then, with its bevel down, you’d tap a bench chisel through the cove, then the bead.  That would be that.  Practical craftsmen simply didn’t “overthink” things like this.  They were busy, trying to make a living.

Turners also employed the “Lamb’s Tongue” on pommels that would lead to a full cylinder or simply an “eased edge” shape.  It’s a wonderful little “touch” that still “holds up” and all serious woodworkers should get familiar with it.