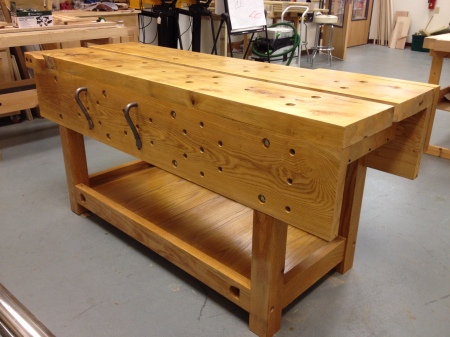
We’re getting closer to finishing this thing up and putting it into everyday service. One question has been repeatedly asked; why are you using shellac for a finish on a workbench?
The normal thinking is that shellac is for fine furniture, musical instruments, carvings and objets d’art. And, of course, the assumption is that the surface would be too reflective and “slick” for a workbench. But the truth of the matter is that shellac provides a durable, protective film that will withstand the harshest treatment. Recoating and repairing a shellac finish is very, very simple; just apply a new coat over the old film, as the alcohol solvent “re-wets” and “bites” into the existing film, creating a complete bond.
But the most significant reason to select shellac as a workbench finish is that it is fast. I was able to put on four coats in something under three hours. It would have taken me four days to put on four coats of oil. This may not be important when you’re first building a bench, but when you decide to recoat an existing bench, you want to be able to get the job done as quickly as possible. Time is money.
There is, however, one caviat. If you’re using a shellac that has any color (orange, amber, garnet, etc.), you must be careful to apply very even layers to avoid lap marks. Witness above. I was using amber shellac (because that what I had) and literally “throwing it on” with a big, soft brush. You can see the lap marks on the apron. While this does nothing to diminish the protective quality of the finish, it does wear at my artistic sensitivities. It’s a pretty simple problem to repair. A little sanding or scraping on the apron’s surface, and a single coat of shellac, padded on, will take care of the problem.
While “rooting” through some old finishes, I found a can of One-Shot sign painter’s gold enamel. The last time I used this stuff was in 1976. No one, in their right mind, would use something that old, right? Well, I opened the can, stirred it up and it looked pretty good. Painted up a little sample and to my surprise it dried just like it was supposed to. So I just couldn’t resist a little “faux gilding” on the date carved into the vise chop. And, we do plan to replace the pipe handle with something a little more “appropriate”.


